
I was recently introduced to Mark Burgess through his brother Craig, who works here at Telestream. Mark is doing some really interesting video work, and even more interestingly – he’s doing all his editing using ScreenFlow. After watching one of his recent interview videos, I asked Mark if he would write up some tips for anyone trying to do multi-camera videos.
Building a Multi-Camera Video using ScreenFlow
by Mark Burgess
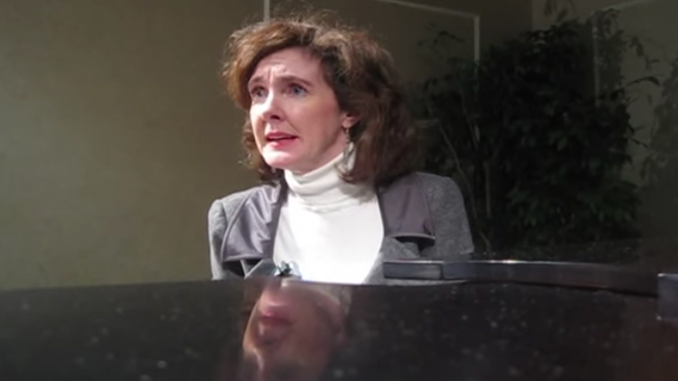
“A Conversation with Pianist Anne-Marie McDermott”
Talking heads have always been boring. In today’s sound-bite- and short-attention-span-online-world, videos online need to be more engaging than even television because of the other immediate alternatives available to capture attention while browsing. Fortunately, the means to produce and edit video has become so affordable that the difference between a good video and a bad one puts the focus on the technique of the maker.
Just like the Polynesian drummer in the movie “Airplane” who switches drumsticks and looks into a different camera for “a special bulletin”, you can move camera angles around a subject and re-engage the viewer. What I’ll describe are my tools and techniques for shooting the example multi-camera video interview of Pianist Anne-Marie McDermott. I used ScreenFlow to edit the entire piece; ScreenFlow’s editing interface makes it easy to cut between the segments. You can use most of the same techniques for shooting your own interview or multi-camera piece.
Preparation
Here’s a supply list of what you’ll need:
Critical list:
- 2 or more cameras
- tripod(s) for at least one
- a microphone separate from the camera (for interviews)
- Duct tape
Nice to Have’s:
- extension cord(s)
- some form of warm colored lighting
- light bounce diffusers
- a quiet place to shoot
The night before a shoot, I ensure I have charged batteries in all my equipment and at least one set of backups for each. (You can never be certain that even charged batteries will last, especially rechargeable ones you’ve had for a while.) I don’t use tapes, so I also ensure that I have sufficient disk space on my camera’s disks and memory cards.
The Cameras
Obviously, it would be better to use the same type of camera for every angle. Matching color and synchronizing sound are easier. (In my case, I like the style of switching camera quality between points of view and don’t attempt to match them.) And there are systems that synchronize the shoot between cameras, but they remain expensive. It would also be better to have someone manage each camera. Most of us, though, are sole operators without the budget to have a studio and personnel. I use the cameras I have, including my iPhone and Blackberry and I pre-position them. I’ve even used the iSight camera on my MacBook, recording directly into ScreenFlow.
For most shoots, I use one high definition camera as the primary point of view and the only one to do any active zooming. I mount it on a full size tripod directly in front of the subject and I stand behind it to ask questions so the subject is looking at the viewer in the finished video. This is also the camera with the key track that contains the sound.
Using a twistable short tripod, I mount a Flip video camera somewhere else near the subject. In the case of the example video, I placed it on the ground with an angle up toward the keyboard so her hands can be seen as they play.
The third camera is a simple, point-and-shoot Canon PowerShot. In the example video, I placed it on the piano on the opposite side of the subject from the Flip camera. I correctly surmised that while talking she would pause to think and look in that direction.
When I’ve settled the subject and started the shoot, I start the main camera, and then I start each of the other cameras. One of the hazards, at this point, is if you’ve been cavalier about checking the cameras and you’re on your own, you could finish the interview and find one of your cameras hasn’t recorded properly. So double check your cameras before you start!
The Lighting
Once onsite, the first thing to do is find where to place your subject. In so doing, consider the sight lines behind your subject from any angle you wish to place a camera. Also, look at the light angles that will touch your subject. Bright backgrounds will put their face in the shade and a bright light on one side will give them an odd, half mask look in your video. If you have time, you can turn the cameras on and shoot yourself to see how well lit the subject will be.
I carry a small work light from Home Depot to provide additional light energy. It’s easy to suspend from the backs of chairs and other furniture, and the light it casts is color true, so I don’t artificially change the scene. A light that’s too hot will give you sharp shadows and one that is too weak won’t fill in shadows from other lighting in the area. You can also use a bounce diffuser or even point the light at a white wall to bounce the light around your subject to fill in shadows from other directional light.
In Praise of Duct Tape
On set, I use duct tape to do everything from suspend a camera on the wall to taping down extension cords around the subject so they don’t trip during the shoot.
The Sound
My primary camera allows for a blue-tooth enabled transponder to connect to a remote and unattached microphone. I use the Sony ECM-HW1R. While mine is a bit bulky, you can still reasonably and discretely tuck it in a shirt or a suit coat. Where that’s not possible, simply setting it nearby can be enough, providing the subject doesn’t turn away from it during the shoot. I also carry a small wired microphone for backup, which requires hiding the wire and doesn’t allow the subject to move very easily or for you to shoot from very far away.
You don’t need to have a sound system integrated with your camera. You can record sound from a separate sound-only device if you like. All three of mine record sound, and that’s the primary method I use to synchronize the tracks in the editor. The key is to give yourself “key” cues. You don’t have to go as far as a Hollywood “clap board”, all you need do is clap your hands loudly at the points you want to mark. That gives you a nice sound spike to see in the editor view.
There are two ways to handle questions in a video interview. You can point one of your cameras at yourself or an interviewer and cut back and forth. That’s more work in the editing room than asking your questions and then getting out of the way, figuratively. The trick with this second approach is to resist the urge to respond to things your subject says, even if it’s a casual “uh-huh.” For some reason, the minute you say “ohhhh”, that’s right when your subject says something you need. However, if you don’t have a separate interviewer, your subject will expect you to engage them. So, what I do is nod a lot, smile or frown, based on what they’re saying. If I need to break in, I’ll often hold up my hand to get their attention which usually stops them.
Editing
The ScreenFlow editing interface makes combining multiple tracks easy. (It’s also a lot faster at importing Windows Media (AVI) and QuickTime (.MOV) files than iMovie.) Once you import the files, you want to line them up in the timeline. Find your key sound spikes on each track and do an initial line up. To make it exact, turn off the sound on all but two of your tracks, the primary one and one other, and balance the audio between those two for volume. Then move the second track until the echo is gone. Repeat this with all of your tracks to get all the tracks lined up precisely.
Once you’ve lined them all up, select the primary track and go to Edit/Detach Audio and move the audio out to its own track. Then go to Edit/Lock and lock the sound clip. At this point, I also set all the other audio tracks to zero, so there is just one source of audio, but the audio in these tracks is still available if for some reason I need to resynch after a late edit.
Now with all your camera tracks lined up, and your audio locked in place, you can “cut” between camera angles by either adding video actions to fade in an out clips, or by splitting clips and deleting sections you don’t need.
Now comes the hard part, the one I can’t help you with much.
Review the footage and decide where you want to set the breaks. But first, do this: in a quiet room, sit for 30 seconds and watch the seconds tick by. That will give you some perspective on what you’ll be asking your users to go through. Keep in mind, especially when you’ve shot the video yourself, you tend to include more and listeners will get bored with 30 seconds of the same thing. As another example, think about all the fast cuts that are done in a commercial on TV, and they still lose people!
There are two dangers to editing multiple tracks. First, that you’ll cut back and forth like a small child with ADD who just drank a sugary fruit drink. And second, that your cuts will be so out of context and jarring that the user will have to take time to get their bearings after each cut. The human brain can decode patterns quickly, but there is processing time a brain goes through when you make a cut. The first time you switch angles they probably won’t expect it, so that transition should come at a subject change. When you’ve done it once, and the more you do it, the faster your viewer will adjust. Now you can make cuts for emphasis even while your subject is talking on the same topic.
Also, be judicious about your use of transition effects. That’s another pattern the viewer has to decode. ScreenFlow has some great effects. I usually adopt one style and stay with it throughout the video.
Remember, you know what the subject said and by the time you’ve edited the video, you’ll have the piece down by heart. Your viewer will likely watch the video only once, so bias toward fewer cuts than you might want to do.
In the end, make something you would want to watch.
Mark Burgess operates PageMountain.com, a consulting company in San Diego, California. He gained his BA in Creative Writing from the University of Arizona and his MBA from the University of San Diego. Definitely a Jack of all trades, he was one of the first 500 certified Project Management Professionals and has written two books on programming and hundreds of articles. He founded sandiego.com and ran it for 15 years. He holds board positions at Mainly Mozart and Media Arts Center San Diego and is active in the Rotary Club. … And he’s doing some great stuff with ScreenFlow.