Getting started is a daunting prospect, but once you get the hang of it, recording your own voice over is actually quite fun! There are many things to remember, but these tips should help get you started!
While it is true that a good voice over with poor quality is better than a poor voice over with good quality, a high quality voice over with high quality equipment is the definitely the way to go. Stay away from any built in microphones on your laptop, and look into purchasing a condenser microphone. We use a Blue Yeti here at Telestream, and for around $100, it pays for itself after just a couple uses.
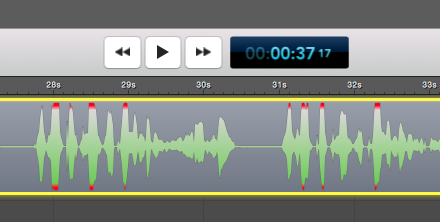
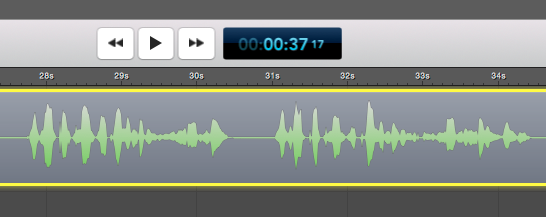
If you do go for the condenser mic (or any microphone), it is worth investing in a pop filter as well. When those pesky popping “p’s” come out of your mouth, they have a tendency to spike the levels in your mic, leaving you with unwanted clipping in your final recording. For around $15 dollars, a pop filter will help reduce those problematic plosives.
People spend incredible amounts of money crafting the ideal recording location. If you are fortunate enough to have a small sound studio, you are in luck. If not, you still have a few options. Try reading your script out loud in every room in your house to see what room may work the best. The less echo and
If you are ready to go deep, grab a blanket, cover yourself and your mic, and have at it! It may look goofy, but the close quarters and soft edges of the blanket provide an incredible imitation of a quality sound studio.
When you sit down to write your script, keep in mind that you will be reading it. If it doesn’t feel comfortable to you, your viewers will be able to tell. This is not an essay, so limiting the language to a casual tone will make the recording process easier. Writing the way that you speak will bring a natural feel to your voice over that your audience will be able to relate to. I bet it will require less practice as well!
Your video has a message. When the voice over becomes focus of your video, your message takes a back seat. Have you ever watched a video and you couldn’t get past a funky voice over? Try to make your voice “invisible.” The ideal voice over will be present, but unobtrusive.
When you have finished recording, watch your video as objectively as possible. What do you see? What do you hear? For me, all I ever hear is my voice. I get caught up in how goofy it sounds! This is the point where I have a friend watch my video for me. Can they “see” past my voice? An outside opinion is crucial to get past how difficult it is to judge your own work.
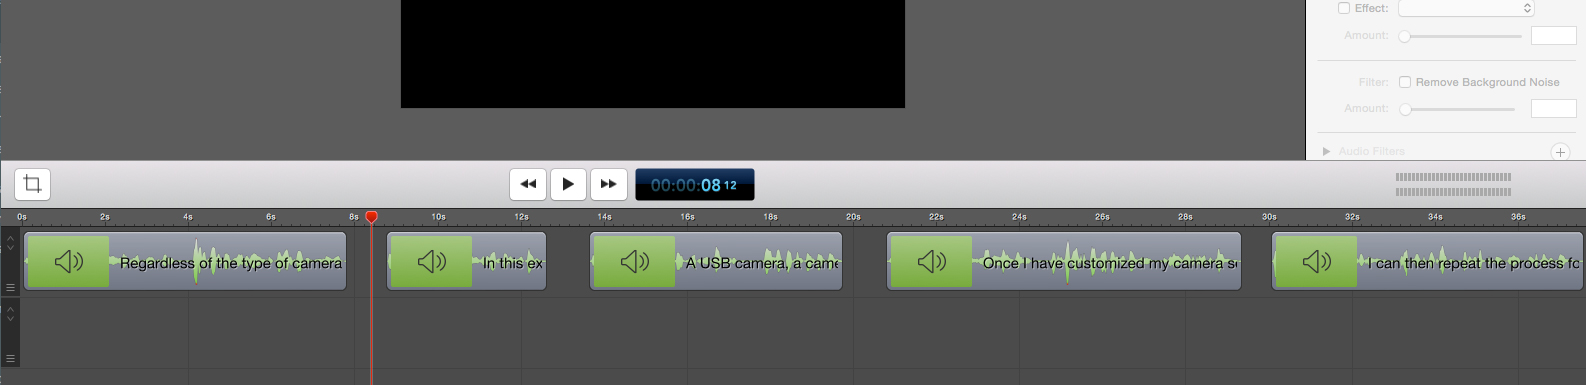
I record all of my voice overs with ScreenFlow, which allows me to finely tune every track I lay down. Without an editor each take has to be perfect, but with the ability to cut out mistakes, breathing or pauses, it makes recording a much simpler process. Once you have finished recording, cut your audio into individual phrases, trimming as close to the beginning and end of the audio. Add a title to each clip to quickly reference them during editing. This way you can find the exact phrase you need, edited and ready to go, making the post production process a bit smoother.